Firmware update via Vensoft: Unterschied zwischen den Versionen
Ojotzo (Diskussion | Beiträge) (Die Seite wurde neu angelegt: „<gallery widths="819" heights="363"> Datei:BGLP_01.png|Menu bar in Vensoft </gallery> == Vencube firmware update via Vensoft == Vencube firmware updates are not only possible with the help of the computer program Ventool, but also via Job Online via Vensoft. === Create a new job === {| |- | style="width:40em" valign="top" | On Vensoft platform, under ⇒ Settings ⇒ Administration ⇒ Jobs, click the "+" symbol to create a new job. | Da…“) |
Ojotzo (Diskussion | Beiträge) Keine Bearbeitungszusammenfassung |
||
| Zeile 1: | Zeile 1: | ||
<gallery widths="819" heights="363"> | <gallery widths="819" heights="363"> | ||
Datei: | Datei:VFU_eng_01.png|Menu bar in Vensoft | ||
</gallery> | </gallery> | ||
| Zeile 11: | Zeile 11: | ||
|- | |- | ||
| style="width:40em" valign="top" | On Vensoft platform, under ⇒ Settings ⇒ Administration ⇒ Jobs, click the "+" symbol to create a new job. | | style="width:40em" valign="top" | On Vensoft platform, under ⇒ Settings ⇒ Administration ⇒ Jobs, click the "+" symbol to create a new job. | ||
| [[Datei: | | [[Datei:VFU_eng_02.png|links|mini|300px|Create a new job]] | ||
|} | |} | ||
| Zeile 18: | Zeile 18: | ||
|- | |- | ||
| style="width:40em" valign="top" | Enter "Update" for the job type to select and apply the software update. | | style="width:40em" valign="top" | Enter "Update" for the job type to select and apply the software update. | ||
| [[Datei: | | [[Datei:VFU_eng_03.png|links|mini|300px|Select software update | ||
]] | ]] | ||
|} | |} | ||
| Zeile 26: | Zeile 26: | ||
|- | |- | ||
| style="width:40em" valign="top" | In the next step, you must select the firmware version to which you want to update your Vencube. To do so, click in the empty "Version" field. All available Vencube firmware versions will then be displayed. At [[Vencube firmware designation]] you will find an explanation of the new firmware version designation. | | style="width:40em" valign="top" | In the next step, you must select the firmware version to which you want to update your Vencube. To do so, click in the empty "Version" field. All available Vencube firmware versions will then be displayed. At [[Vencube firmware designation]] you will find an explanation of the new firmware version designation. | ||
| [[Datei: | | [[Datei:VFU_eng_04.png|links|mini|900px|Select firmware version]] | ||
|- | |- | ||
| style="width:30em" valign="top" | Select the desired firmware and apply it. | | style="width:30em" valign="top" | Select the desired firmware and apply it. | ||
| Zeile 41: | Zeile 41: | ||
|} | |} | ||
| [[Datei: | | [[Datei:VFU_eng_05.png|links|mini|900px|Adopt firmware version]] | ||
|} | |} | ||
| Zeile 48: | Zeile 48: | ||
|- | |- | ||
| style="width:40em" valign="top" | In the "Select Vencubes" field, enter the serial numbers of the Vencubes you want to update. Then select and apply all desired Vencube serial numbers. A list of the selected Vencubes will then open below, along with the corresponding information for review. You can remove individual Vencubes that you do not want to receive an update using the trash can in the first column. | | style="width:40em" valign="top" | In the "Select Vencubes" field, enter the serial numbers of the Vencubes you want to update. Then select and apply all desired Vencube serial numbers. A list of the selected Vencubes will then open below, along with the corresponding information for review. You can remove individual Vencubes that you do not want to receive an update using the trash can in the first column. | ||
| [[Datei: | | [[Datei:VFU_eng_06.png|links|mini|900px|Select Vencubes]] | ||
|} | |} | ||
| Zeile 55: | Zeile 55: | ||
|- | |- | ||
| style="width:40em" valign="top" | At "When is this job active?" you can select the time when the update should be performed. You can choose either "Immediately" or at a specified time in the future, which you can set using the "From" option by selecting the date and time. | | style="width:40em" valign="top" | At "When is this job active?" you can select the time when the update should be performed. You can choose either "Immediately" or at a specified time in the future, which you can set using the "From" option by selecting the date and time. | ||
| [[ | | [[VFU_eng_07.png|links|mini|600px|Select time]] | ||
|} | |} | ||
{| class="wikitable" | {| class="wikitable" | ||
| Zeile 72: | Zeile 72: | ||
|- | |- | ||
| style="width:40em" valign="top" | A job group can be created in the final query. This is recommended if multiple Vencubes are to be updated at once. The advantage is that the update progress can be clearly monitored under ⇒ Settings ⇒ Administration ⇒ Job Groups in the corresponding job group. | | style="width:40em" valign="top" | A job group can be created in the final query. This is recommended if multiple Vencubes are to be updated at once. The advantage is that the update progress can be clearly monitored under ⇒ Settings ⇒ Administration ⇒ Job Groups in the corresponding job group. | ||
| [[Datei: | | [[Datei:VFU_eng_08.png|links|mini|600px|Create job group]] | ||
|} | |} | ||
| Zeile 79: | Zeile 79: | ||
{| | {| | ||
|- | |- | ||
| [[Datei: | | [[Datei:VFU_eng_09.png|links|mini|1200px|Update history]] | ||
|- | |- | ||
| style="width:40em" valign="top" | The update progress can be monitored online. A firmware update consists of a total of 8 data packages. These packages are downloaded gradually and displayed accordingly in the job progress:<br>13% ⇒ 25% ⇒ 38% ⇒ 50% ⇒ 63% ⇒ 75% ⇒ 88% ⇒ 100%.<br>As soon as the update has been completely downloaded, the Vencube begins flashing. This is indicated by LEDs 1 and 2 on the Vencube flashing red and green in a sequence. <br> | | style="width:40em" valign="top" | The update progress can be monitored online. A firmware update consists of a total of 8 data packages. These packages are downloaded gradually and displayed accordingly in the job progress:<br>13% ⇒ 25% ⇒ 38% ⇒ 50% ⇒ 63% ⇒ 75% ⇒ 88% ⇒ 100%.<br>As soon as the update has been completely downloaded, the Vencube begins flashing. This is indicated by LEDs 1 and 2 on the Vencube flashing red and green in a sequence. <br> | ||
Version vom 14. März 2025, 10:37 Uhr
-
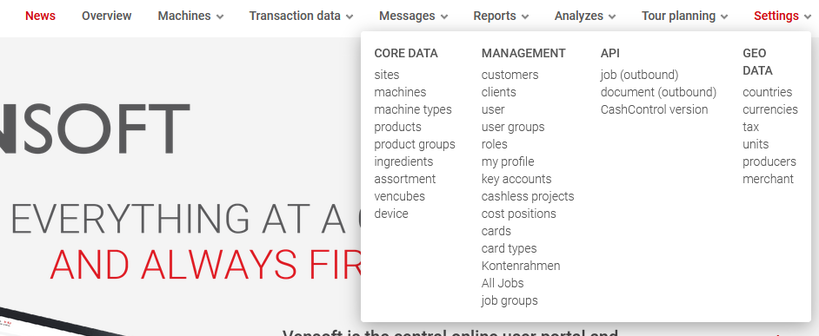
Menu bar in Vensoft

Vencube firmware update via Vensoft
Vencube firmware updates are not only possible with the help of the computer program Ventool, but also via Job Online via Vensoft.
Create a new job
| On Vensoft platform, under ⇒ Settings ⇒ Administration ⇒ Jobs, click the "+" symbol to create a new job. |  |
Select Software Update as job type
| Enter "Update" for the job type to select and apply the software update. |  |
Select firmware version
| In the next step, you must select the firmware version to which you want to update your Vencube. To do so, click in the empty "Version" field. All available Vencube firmware versions will then be displayed. At Vencube firmware designation you will find an explanation of the new firmware version designation. |  | ||||
Select the desired firmware and apply it.
|
 |
Select Vencubes
| In the "Select Vencubes" field, enter the serial numbers of the Vencubes you want to update. Then select and apply all desired Vencube serial numbers. A list of the selected Vencubes will then open below, along with the corresponding information for review. You can remove individual Vencubes that you do not want to receive an update using the trash can in the first column. |  |
Select time
| At "When is this job active?" you can select the time when the update should be performed. You can choose either "Immediately" or at a specified time in the future, which you can set using the "From" option by selecting the date and time. | links|mini|600px|Select time |

|
Once the job has been created in Vensoft and the execution time has been reached, a message from the Vencube is required to initiate the firmware update. This can be a sale, a service button, or the "Ready" message on the hour, provided this setting is enabled in the corresponding Vencube. |
|
|
During the flash process (more information at ⇒ Update history), the machine will be out of service for approximately 10 minutes. Therefore, choose a time when the machine is as quiet as possible (depending on the location, e.g., at night). |
Create job group
| A job group can be created in the final query. This is recommended if multiple Vencubes are to be updated at once. The advantage is that the update progress can be clearly monitored under ⇒ Settings ⇒ Administration ⇒ Job Groups in the corresponding job group. |  |
Update history
 | ||
| The update progress can be monitored online. A firmware update consists of a total of 8 data packages. These packages are downloaded gradually and displayed accordingly in the job progress: 13% ⇒ 25% ⇒ 38% ⇒ 50% ⇒ 63% ⇒ 75% ⇒ 88% ⇒ 100%. As soon as the update has been completely downloaded, the Vencube begins flashing. This is indicated by LEDs 1 and 2 on the Vencube flashing red and green in a sequence. During the flashing process, the Vencube and the connected payment systems are out of service. This can result, for example, in the message "Credit system failure" appearing on the machine's display. A firmware update takes about 25 minutes in total, with the download and flashing processes each taking about half of that time.
|