Firmware update via Ventoolwin

Aus Vensolutions
Version vom 23. Februar 2022, 10:26 Uhr von Apaul (Diskussion | Beiträge) (Die Seite wurde neu angelegt: „==Preparation== '''Required:''' *Windows PC with a serial or free USB port *VenToolWin.exe program *License Key *a serial Ventool connection cable (possibly…“)
(Unterschied) ← Nächstältere Version | Aktuelle Version (Unterschied) | Nächstjüngere Version → (Unterschied)
Zur Navigation springen Zur Suche springen

Preparation

Required:

  • Windows PC with a serial or free USB port
  • VenToolWin.exe program
  • License Key
  • a serial Ventool connection cable (possibly with USB ⇔ serial adapter)
  • One Vencube to configure

Download Firmware

Program start and program setup

Before the program start

  • Before starting the program, connect the USB Ventool connection cable including the appropriate USB adapter to the PC.
  • Now you can start the program Ventoolwin.exe.

Select serial port

  • The COM interface is selected in the program itself, via a drop-down menu '"Serial interface".
  • All available COM interfaces are displayed in the drop-down menu. You should select the appropriate interface here.
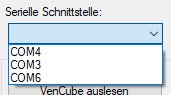
Further information and explanations about the program can be found here:
VenToolWin

Transfer to Vencube

Perform firmware update

Step 1
After the Vencube has been connected to the PC and the program has been started, first read out the Vencube.
read out Vencube
Step 2
Now the "Firmware update" button can be pressed.
"Firmware update" button
Step 3
After pressing the "Firmware update" button, Explorer opens. Now the desired firmware file can be selected in Explorer.
File selection in Explorer
Step 4
The firmware file is transferred to the Vencube immediately and takes a few minutes.
Transfer 10%
Step 5
When the transmission has reached 90%, the firmware file in the Vencube is checked, this also takes a few minutes.
Transfer 90%
Step 6
After checking the firmware file, the Vencube will be flashed. The process is indicated by the two LEDs on the Vencube flashing quickly.

Under no circumstances disconnect the Vencube or the machine from the mains during the flash process, this will immediately lead to a defect in the Vencube.
Please wait until the flashing process is complete.

flash
Step 7
This message appears after successful flashing. The Vencube now has a new firmware.
The Ventoolwin program automatically re-reads the Vencube.
flash finished